Table of Contents
How to Reset cPanel File Manager: A Step-by-Step Guide #
Starting fresh with cPanel is an excellent way to reset the file manager, ensuring a clean and organized workspace. Follow this step-by-step guide to learn how to reset the cPanel file manager:
Easy Guide to Reset cPanel File Manager: #
- First, log in to your cPanel and select the “File Manager” option to view all existing files and folders.
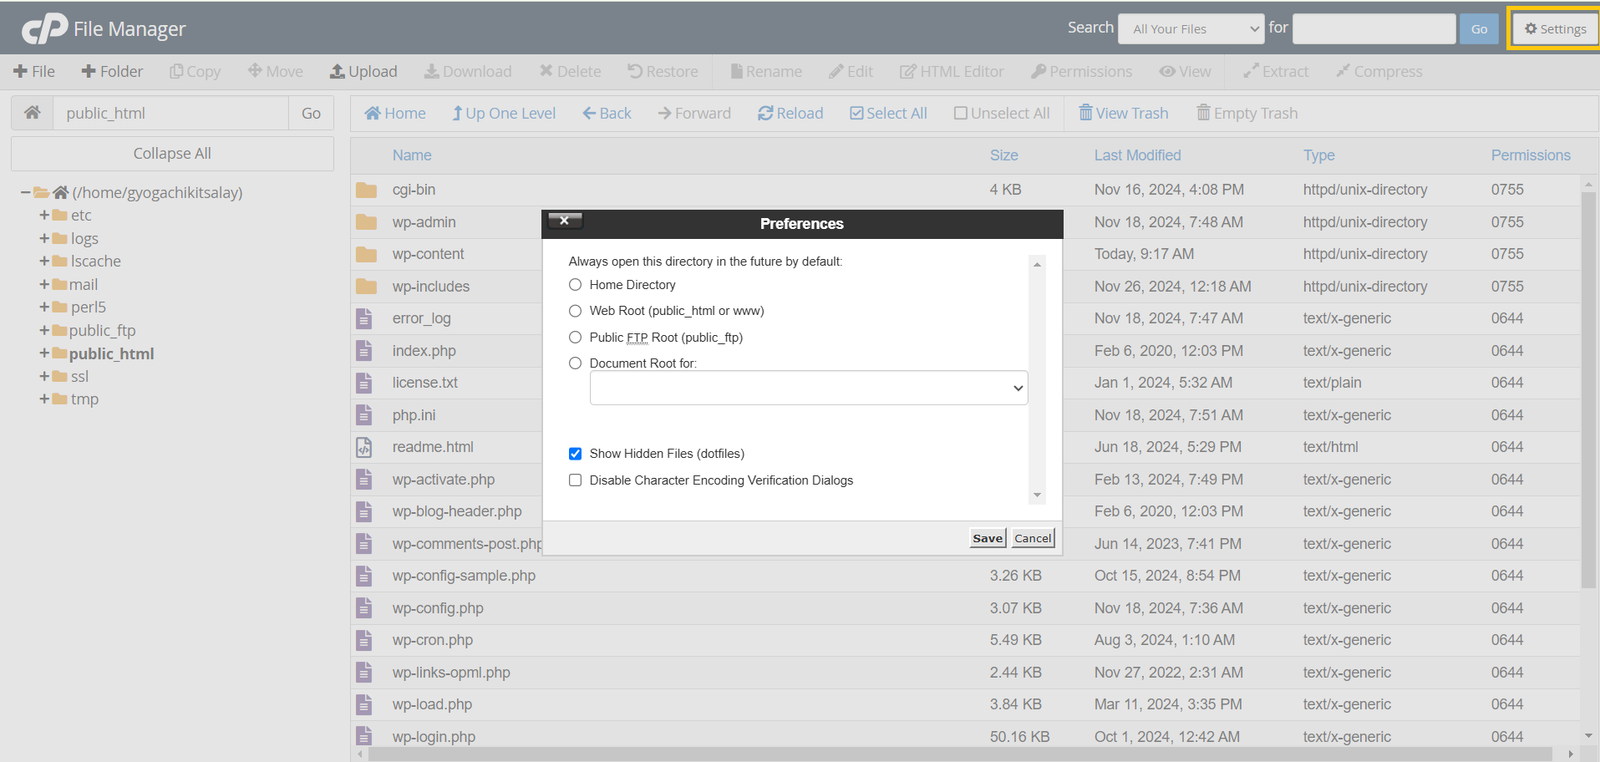
- Some hidden files may also be present.
- You need to adjust settings to view these hidden files.
- Go to the “Settings” option.
- Check the “Show hidden files” box.
- Delete all existing files and folders to begin the reset process.
- Select the “Select All” option.
- Click the “Delete” button.
- A confirmation popup will appear. Skip the recycle bin option if not needed.
- Confirm the deletion.
- All files and folders will be deleted.
- Reload the page by clicking the “Reload” option. After reloading, you may see folders like trash, cPanel, etc., which are used by cPanel for technical operations.
- Upload the original or standard cPanel files and folders to reset the file manager. This will allow you to use WordPress or other websites.
- Click the “Upload” button.
- Select the file to upload and click “Open.”
- The upload will complete.
- Reload the page again.
- Extract the zip folder by entering a slash without selecting a directory.
- Click the “Extract” button.
- The original files and folders of your cPanel will be displayed.
- Ensure your public_html file is clickable; if it is, the reset process was successful.
- Delete the zip file once the task is complete.

In Conclusion
Resetting the cPanel file manager is simple. You can use a similar method to format it. Reach out to us if you have any questions.


